
Getting Your Studio Ready for a CRM Migration
Switching to Market Muscles from another system? Our Migrations Team can bring your students, memberships, classes, retail products, styles, and ranks over for you.
One important thing to know before we start: when we import a student, we match them to the styles, rosters, and membership plans that already exist in your Market Muscles account. If something is missing, that student cannot be imported until it exists. That is why this guide starts with setup, and finishes with sending us your data.
In Market Muscles, your location is your studio. Everything below is done inside your own account, so nothing here can affect your current system.
The Key Steps
- Add your styles and their belt ranks.
- Add your rosters.
- Add your classes.
- Create your membership plans.
- Create your trial plans and retail products.
- Add the contact statuses you want to keep.
- Send us your member and lead data.
- Review what we stage, then we finish the migration.
Have this handy before you start: a list of the plan names, styles, ranks, and rosters you use today, and the ability to export a report or spreadsheet from your current system.
1. Add Your Styles and Belt Ranks
A style is a program you teach, such as Karate, Taekwondo, or Kids Martial Arts. Each style holds its own list of belt ranks.
- Go to Studio Setup → Ranks & Rosters → Styles.
- Click Add Style, then type the style name.
- Add that style's belt ranks in order, from lowest to highest.
- Repeat for every style you teach.
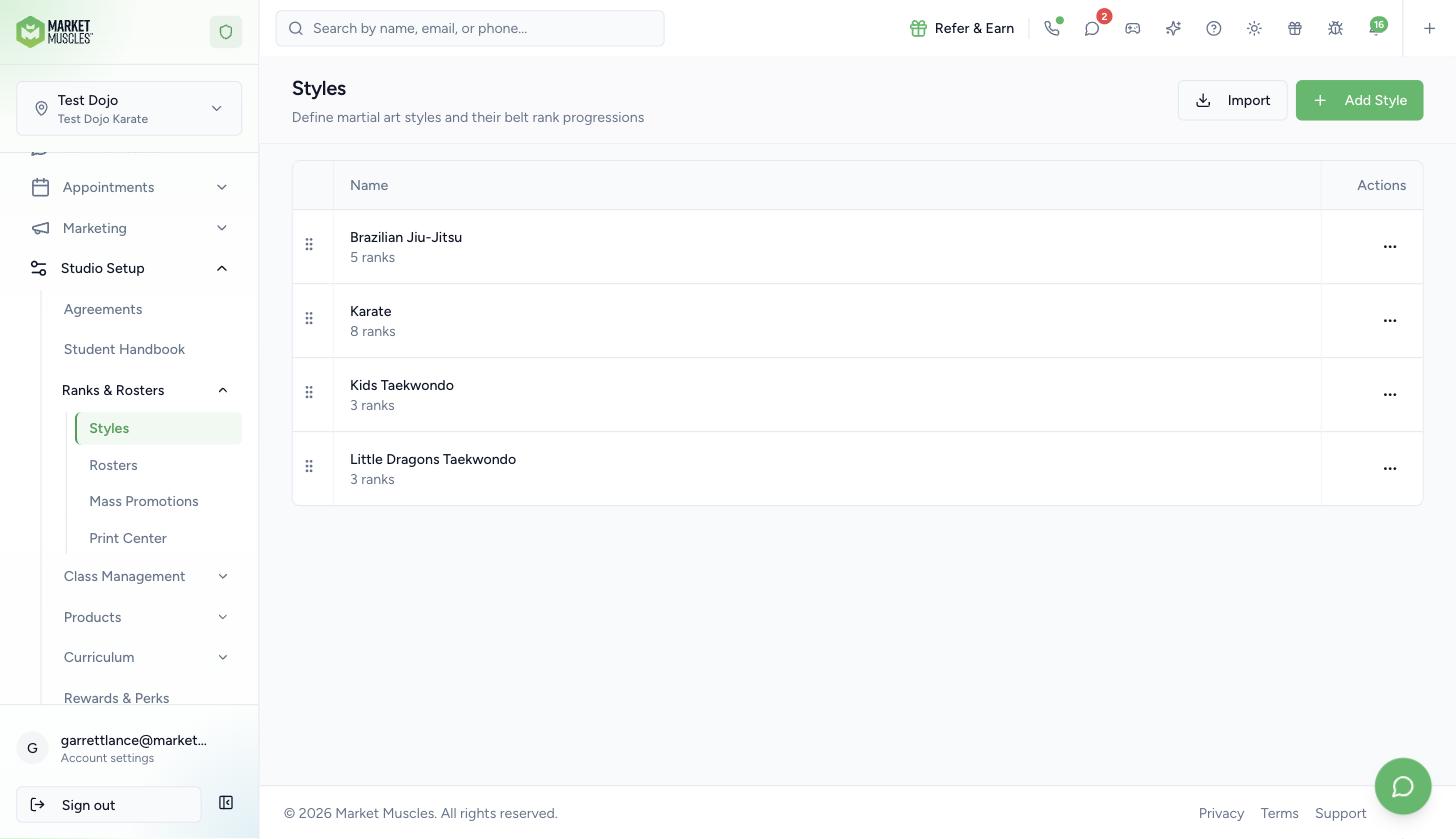
Use the same names your current system uses. We match your students' styles and ranks by name, so "Karate" and "Karate (Kids)" will not match each other.
Tip: if the Migrations Team sends you a share code for your styles, you can paste it into Import on the Styles page and skip the typing.
2. Add Your Rosters
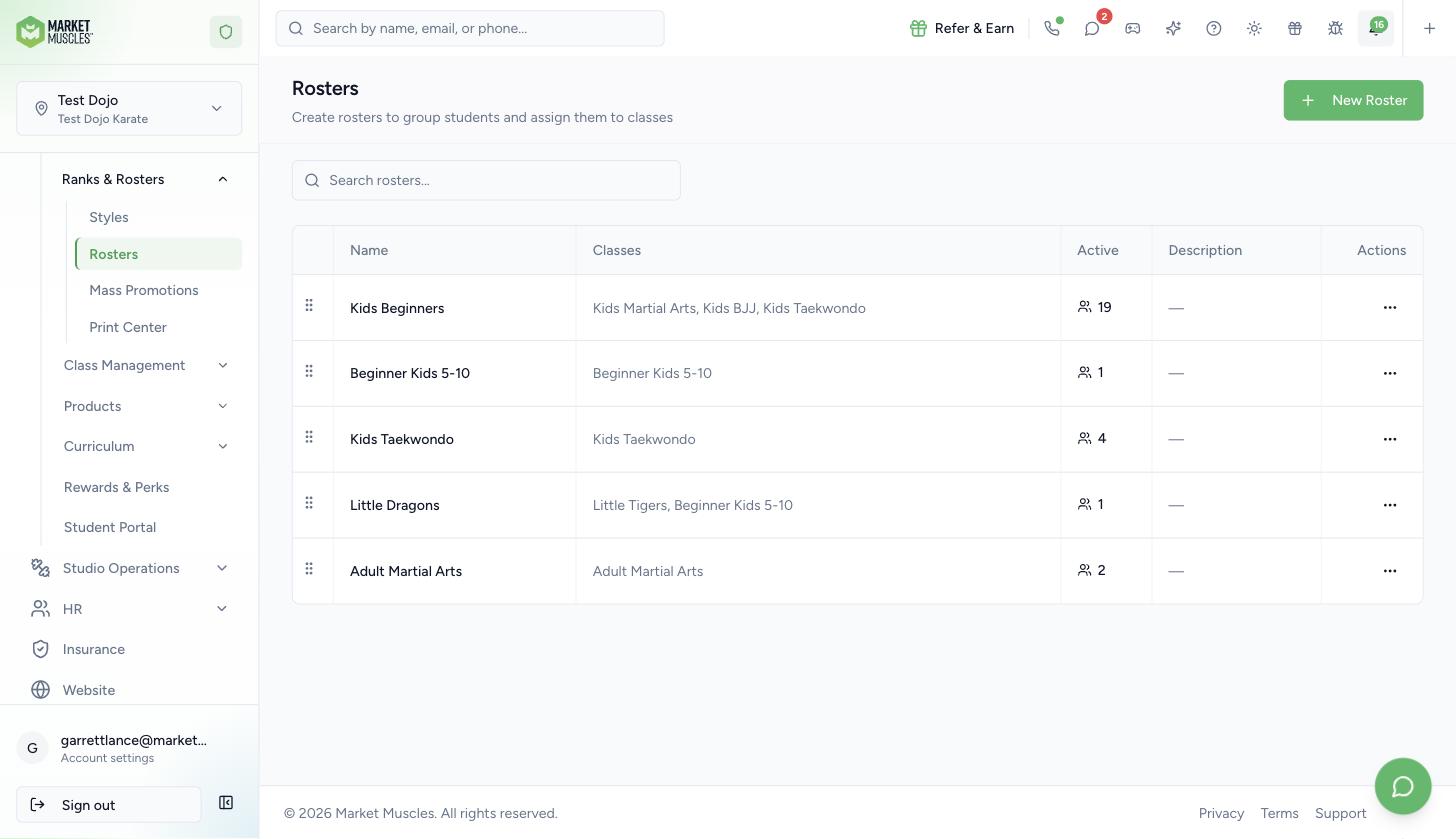
Rosters are the groups you sort students into, such as Kids Beginners or Adult Martial Arts. Classes are built on top of rosters, so create them first.
- Go to Studio Setup → Ranks & Rosters → Rosters.
- Click New Roster and name it the way your team says it out loud.
- Create one roster for each group you track.
3. Add Your Classes
- Go to Studio Setup → Class Management → Classes.
- Click Add Class.
- Enter the class name, choose its category and style, and set the days and times it runs.
- Set the class to Active.
- Use Categories, Spaces, and Schedules in the same section if you need to set up the supporting lists first.
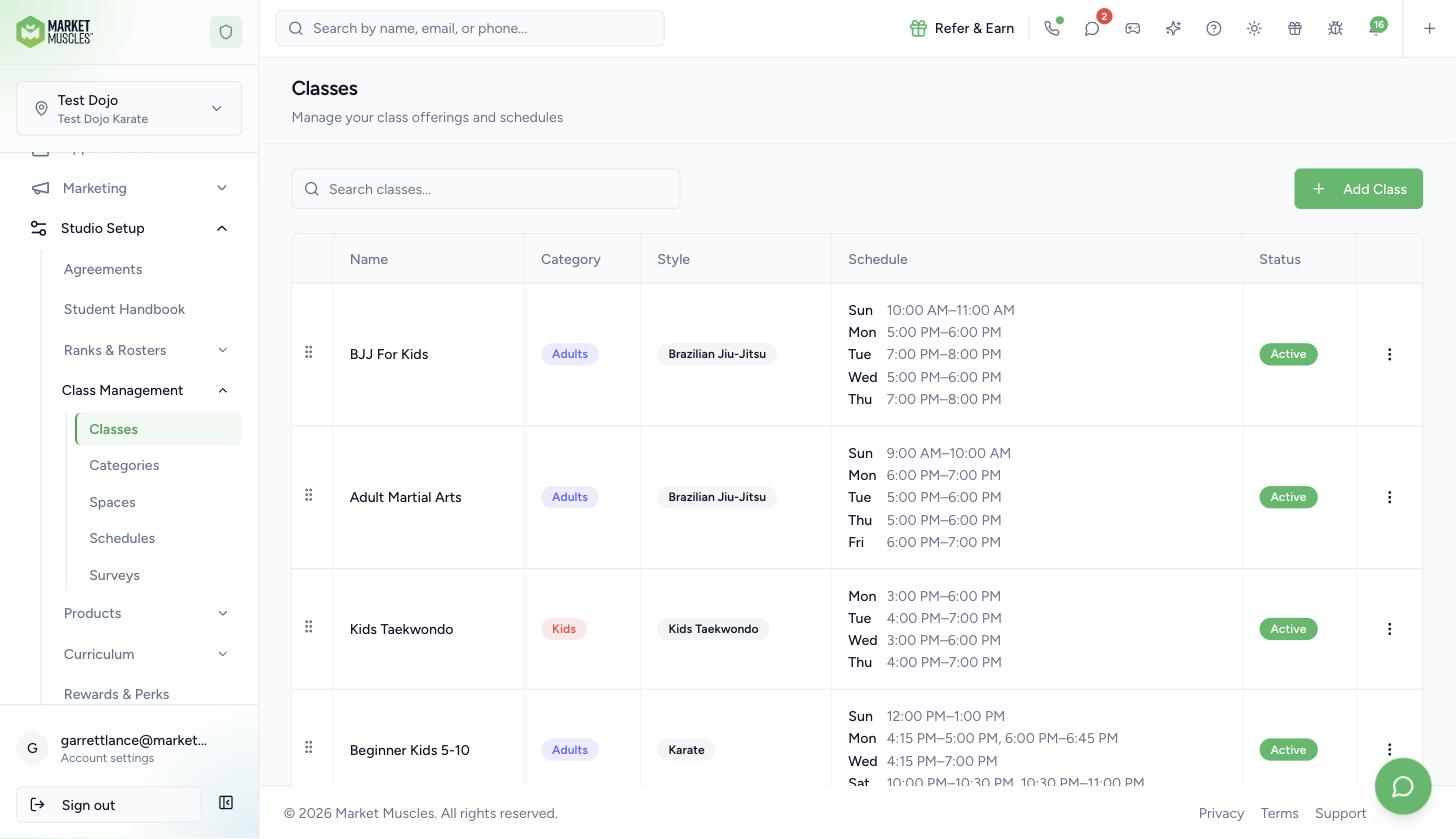
Classes and rosters are what connect your students to their attendance and check-in history, so it is worth matching the names your students already know.
4. Create Your Membership Plans
- Go to Studio Setup → Products → Memberships.
- Click Create Membership.
- Enter the plan name, the price, and how it bills (per month, per week).
- Choose how long the plan runs: ongoing, or a set number of payments.
- Add a down payment if you charge one.
- Click Categories on this page to group plans the way you think of them, for example Kids Martial Arts and Adult Martial Arts.
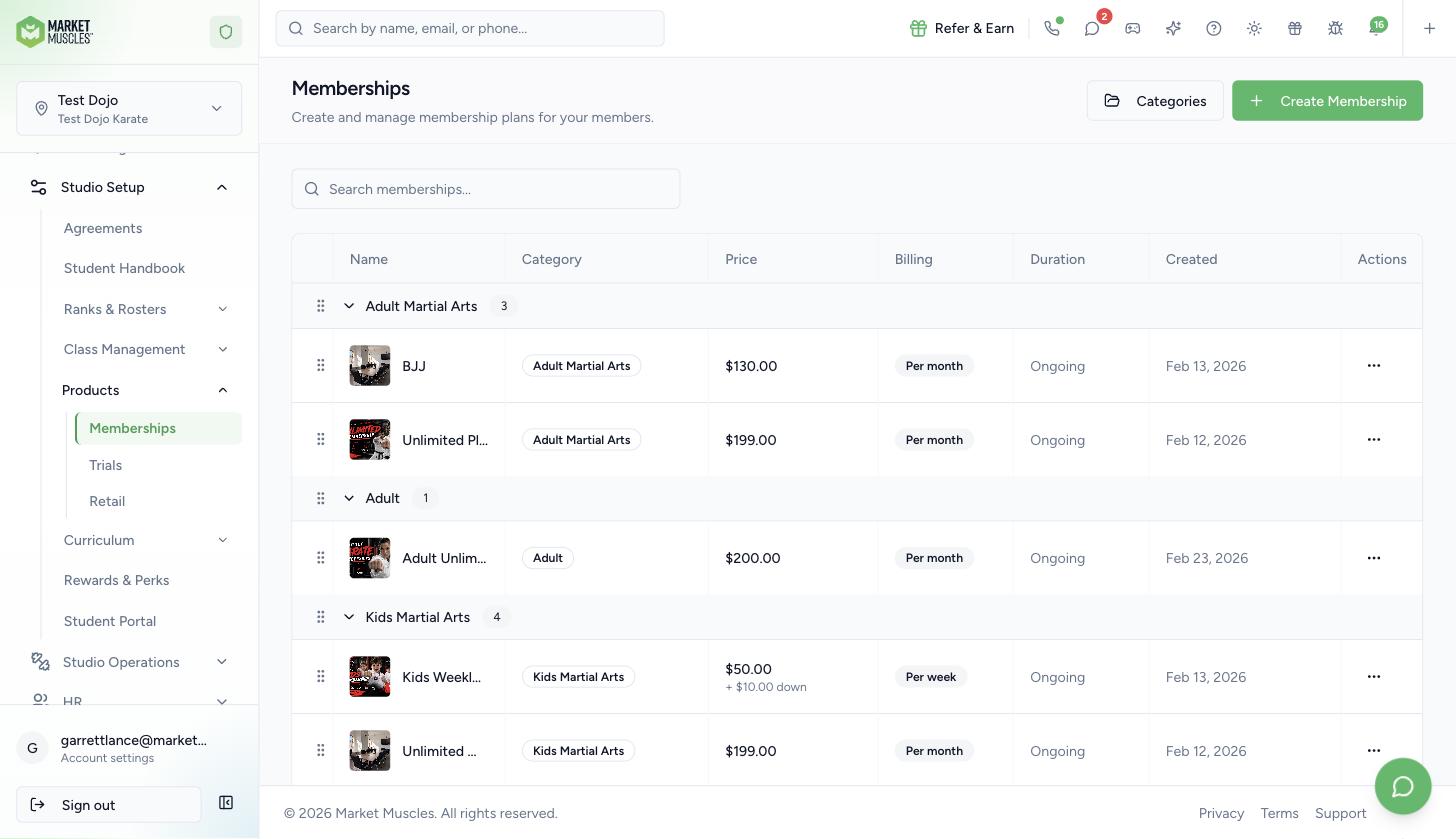
This step matters more than any other. When we import a member, we look for their plan by name. If we cannot find it, the member cannot be imported with their billing. So use the exact plan names from your current system.
If two of your plans share a name but sit in different categories, set up the categories here and tell us which category each plan belongs in. That way we import the right one.
5. Create Your Trial Plans and Retail Products
- Go to Studio Setup → Products → Trials and click Add Trial for each trial offer you run.
- Go to Studio Setup → Products → Retail and click Add New for the gear and merchandise you sell at the front desk.
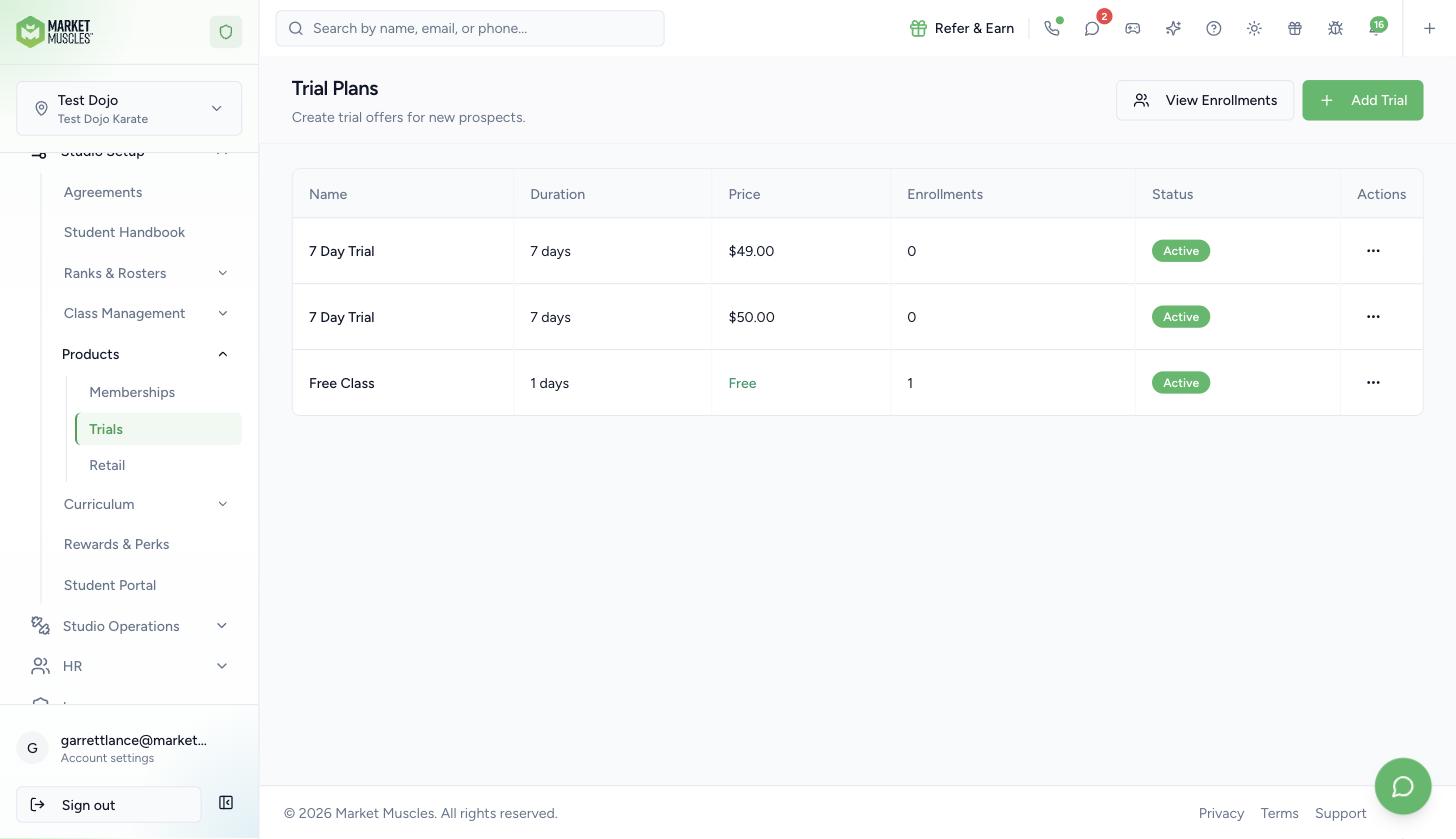
Trials work like memberships: we match them by name. Retail products only need to be created if you want us to bring your product list over.
6. Add the Contact Statuses You Want to Keep
Statuses are the stages you track contacts at, such as Active, Contacted, or Follow Up. They are set separately for each contact type.
- Go to Contacts → Statuses.
- Choose the contact type you are adding a status for: Leads, Trials, Members, Previous Trials, Previous Members, Contacts, or Walk-Ins.
- Click Add Status and name it.
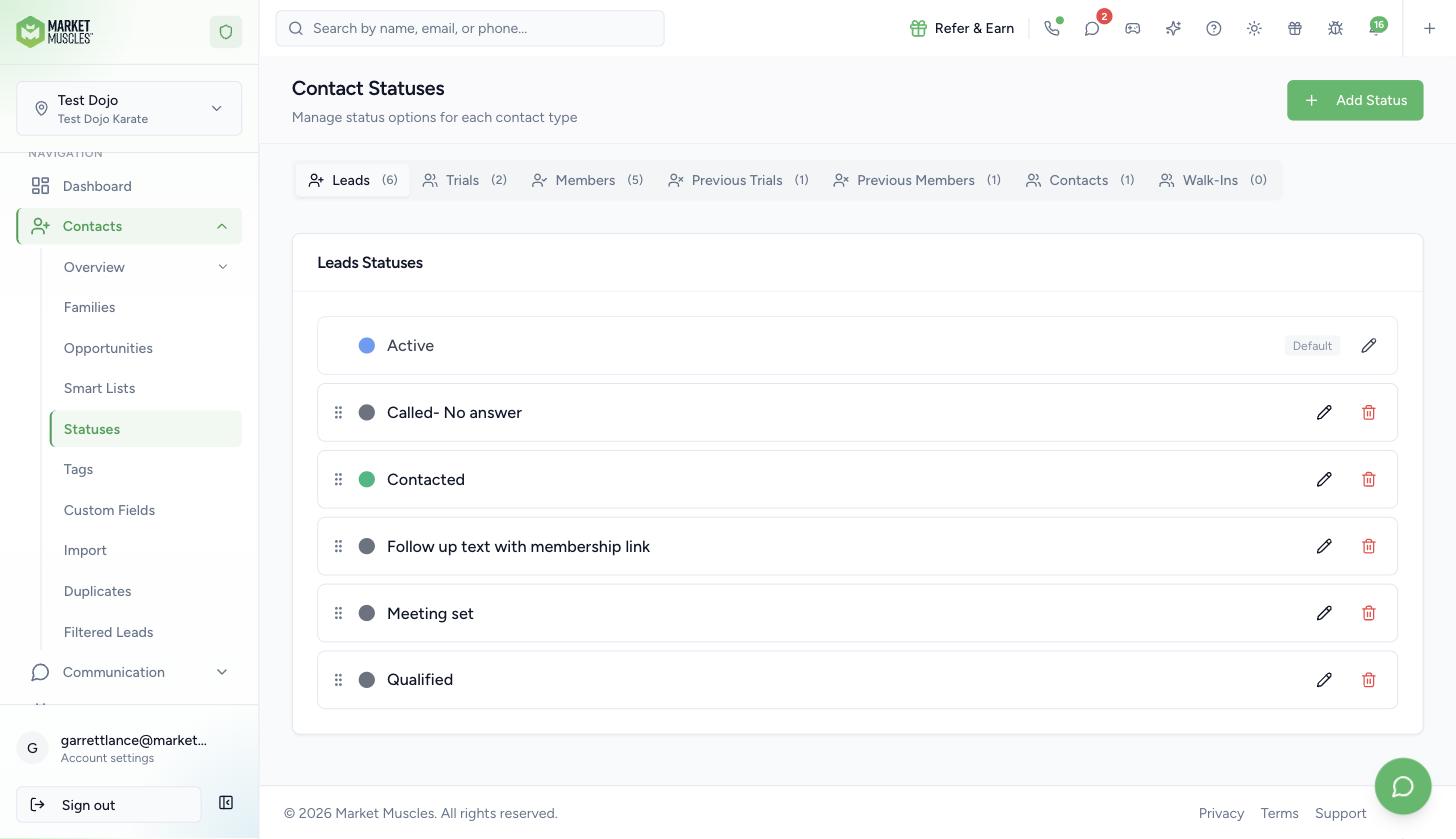
If your file uses a status that does not exist in your account, the student still imports, but their status is left blank. So if you care about a status (for example, one that marks former students), create it here first.
Tags work differently. Go to Contacts → Tags only if you want to build tags in advance. Any tag in your file that does not exist is created automatically during the import, so you do not have to set tags up.
7. Send Us Your Member and Lead Data
Start by exporting your members and leads out of your current system. Once you have that file, send it over to us and our Migrations Team does the import for you, so you do not have to run the import yourself. You do not have to hand over your login if you would rather not, the export on its own is enough for us to get started.
You have two options. Use Option A if memberships or billing are involved.
Option A: Let our Migrations Team handle it (recommended)
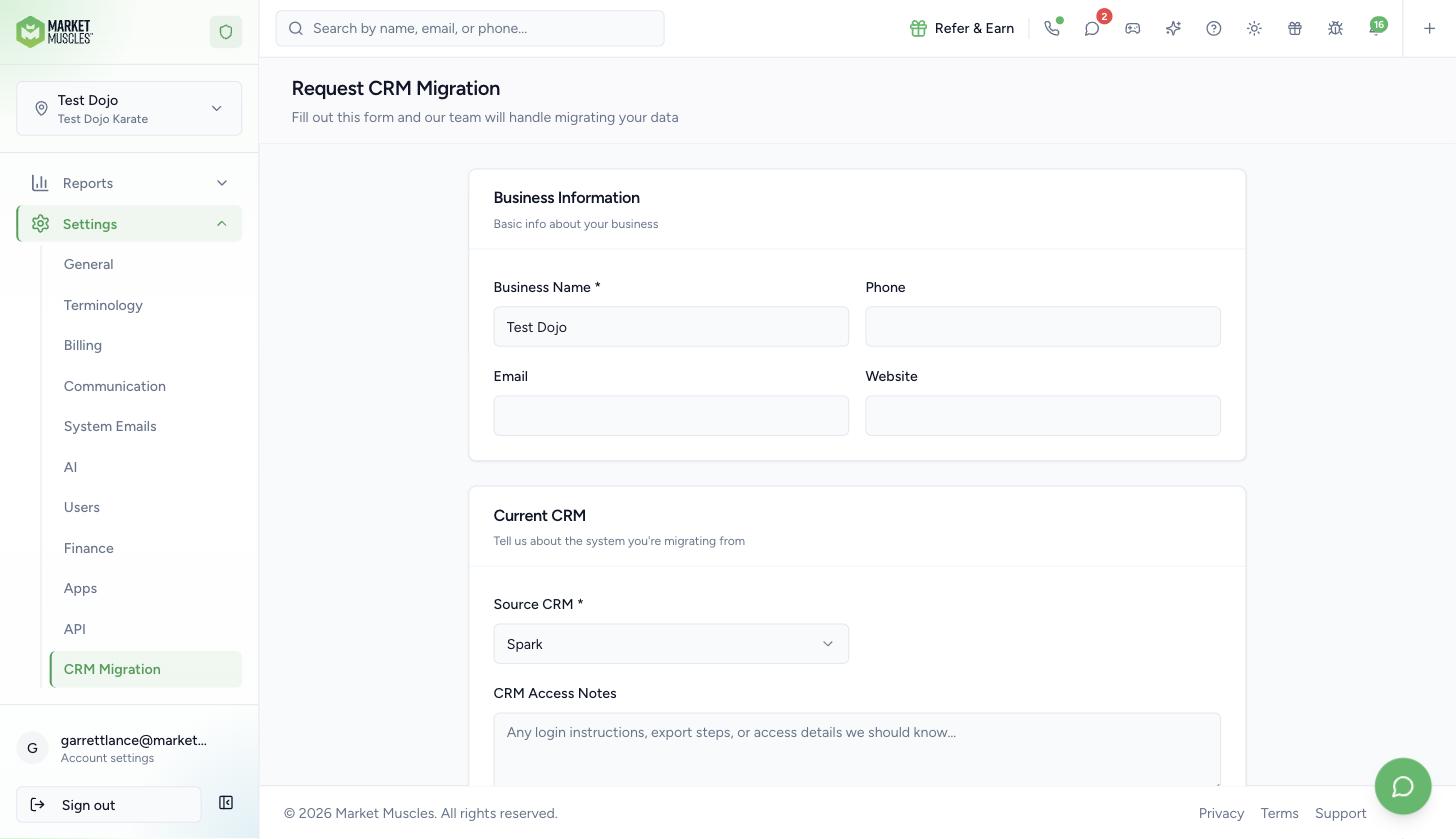
- Go to Settings → CRM Migration.
- Fill in your Business Information.
- Choose your Source CRM: Spark, MyStudio, Zivvy (Rainmaker), Kicksite, Gymdesk, or Other.
- In CRM Access Notes, tell us how to get into your current system, including login instructions or export steps. If you would rather not share access, say so here and we will tell you exactly which files to send us instead.
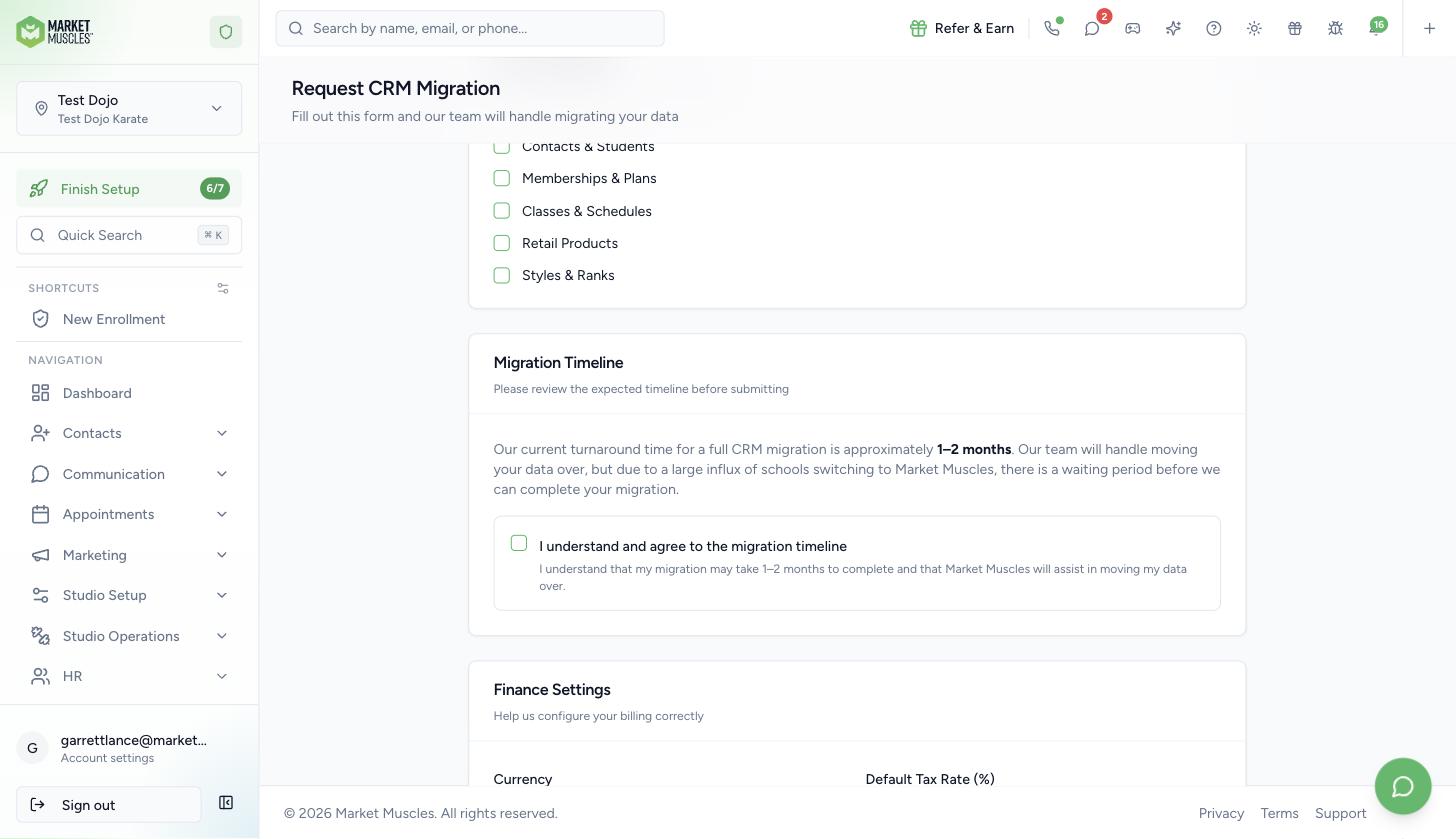
- Under What to Migrate, tick the pieces you want moved: Contacts & Students, Memberships & Plans, Classes & Schedules, Retail Products, Styles & Ranks.
- Read the migration timeline and tick the box to acknowledge it.
- Complete Finance Settings: your currency, default tax rate, which payment methods you accept, and whether you want processing fees passed on to customers.
- Add anything else we should know in Additional Notes, then click Submit Migration Request.
What to put in your member and lead export
One row per student. Members and leads are both contacts, so include everyone in one file and let us sort them out.
- First name, last name, email, and phone.
- Birthday, and the date the student was added, if you have them.
- For students under 18: guardian first name, guardian last name, guardian email, and guardian phone. Fill in both guardian names, or leave both blank.
- For members: the membership plan name, membership start date, next billing date, and the end date if the membership ends.
- For trial students: the trial plan name, trial start date, and trial end date.
- Optional extras: tags, address, style, belt rank, and roster.
- Dates in YYYY-MM-DD format.
Send the file as a CSV. From Excel or Google Sheets, use File → Save As → CSV. If your column headings match the field names we use, the matching is done for you.
Send the finished export to our Migrations Team and we import it into your location for you. If you have already submitted your migration request, note in Additional Notes that your export is on the way, and we will take it from there.
Option B: Import leads yourself with a CSV
- Go to Contacts → Import, then click New Import.
- Give the import a Name.
- Choose the Import Type: Leads Only, Members (with memberships), or Trial Students (with trial enrollment).
- Upload your CSV, or click Download Example CSV first to see the exact column headings we expect.
- In Map Columns, match each of your columns to our field. Columns named the same as ours are matched automatically.
- In Confirm Import, review the rows. Anything we could not read is flagged so you can fix it before continuing.
- Click Import.
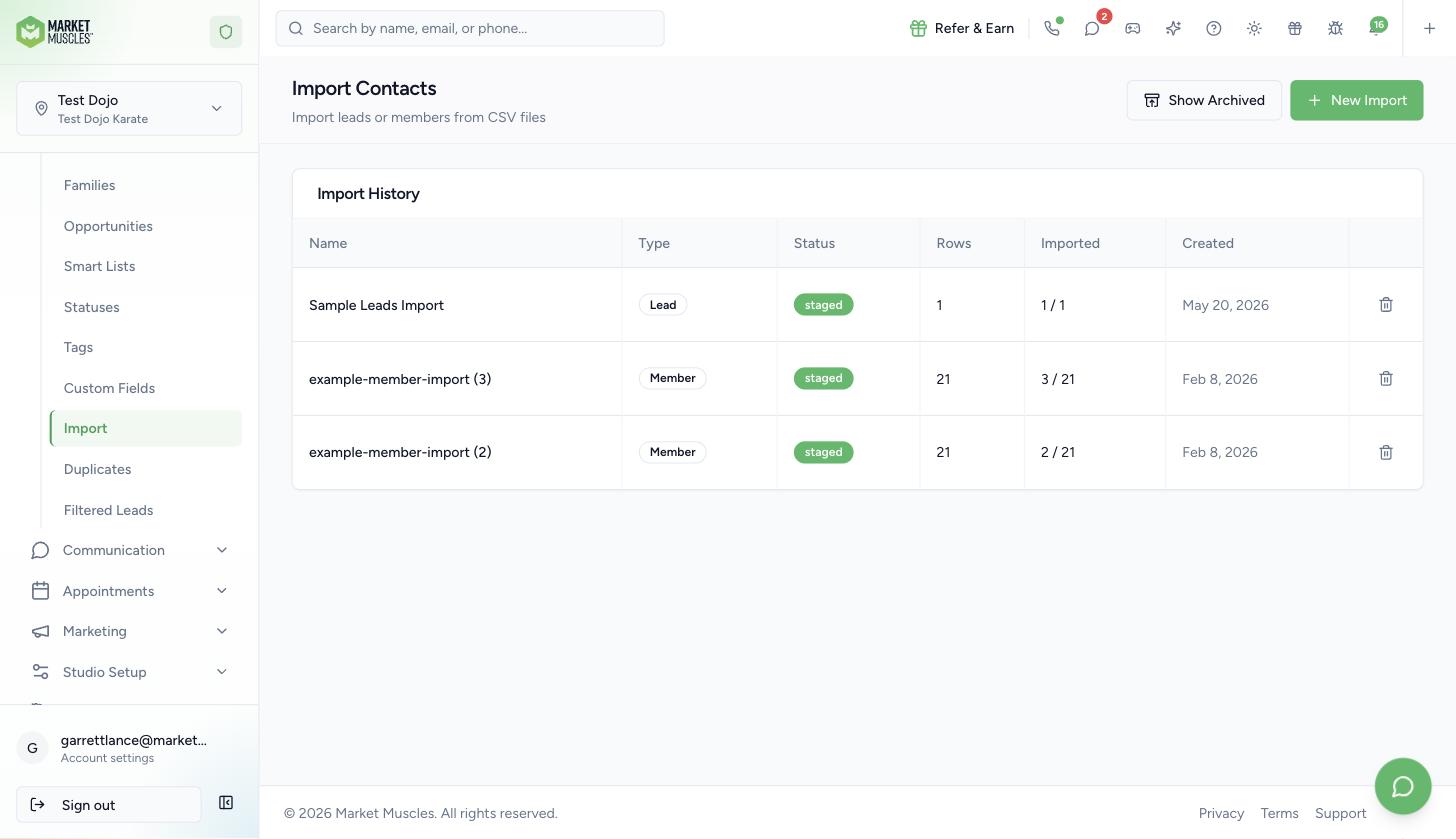
A Type column lets each row carry its own contact type, so former students can come in as Previous Member instead of as a new lead. If you are importing members, the plans from step 4 must already exist, and the plan names have to match.
One thing to plan for: card and bank details saved in your current system cannot be brought over by an import. When your members are ready to be billed here, we send each of them a secure link to add their card or bank account.
8. Review What We Stage, Then Go Live
Once we begin, you can follow the progress at Settings → CRM Migration. Your request moves through these stages: Pending Review, In Progress, Ready for Your Review, Reviewed, and Completed.
Staged means we have prepared the data but have not saved it to your account yet, so you get to check it first. When your staged data is ready, a banner appears at the top of your dashboard letting you know your migration data is ready for review. On that page you can look through the styles, classes, memberships, and products we prepared, confirm they look right, and then we commit them to your location.
About billing and timing: so you do not charge anyone twice, we time the member import so your members' next billing dates fall after your go-live date. Keep billing in your current system until we confirm you are ready to switch.
If Something Does Not Import
When you review an import, each row shows the reason it was skipped or flagged. These are the common ones and how to fix them.
- Style "(name)" not found. Add that style in Studio Setup → Ranks & Rosters → Styles.
- Belt rank "(name)" not found. Add that rank under the matching style.
- Roster "(name)" not found. Add that roster in Studio Setup → Ranks & Rosters → Rosters.
- Membership plan "(name)" not found. Create the plan with that exact name, or correct the name in your file.
- Trial plan "(name)" not found. Create that trial plan first.
- First name is required. Fill in the student's first name.
- Invalid email format, or Invalid phone format. Correct that cell, then import the row again.
- Guardian last name is required when first name is provided. Fill in both guardian names, or clear both.
- Status "(name)" not found, will be skipped. The student still imports, but without that status. Add the status if it matters.
Quick Checklist
- Styles created, each with its belt ranks
- Rosters created
- Classes added, with days, times, and rosters
- Membership plans created, named the same as your current system
- Trial plans created, if you run trials
- Retail products created, if you sell gear
- Contact statuses created for the statuses you want to keep
- Member and lead export prepared as a CSV
- CRM Migration request submitted at Settings → CRM Migration
If you have any questions about getting your studio ready for a migration, please reach out to the Market Muscles Support Team.