Import
How To Import New Leads Into Market Muscles
Learn how to efficiently upload and manage your potential customer database using CSV files. This guide walks you through mapping columns and resolving duplicate contact warnings to ensure your CRM stays organized.
1. Navigate to https://app.marketmuscles.com/
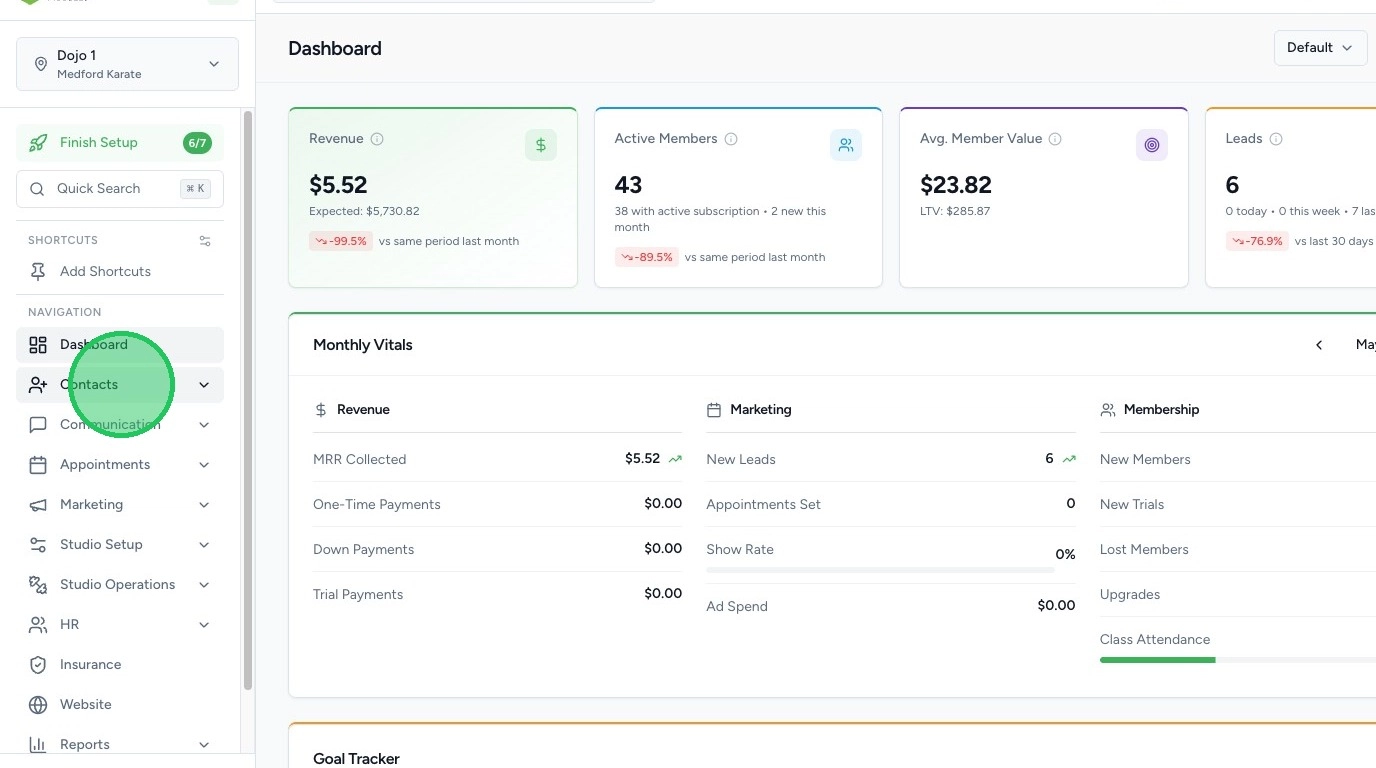
2. Navigate to the Import Section
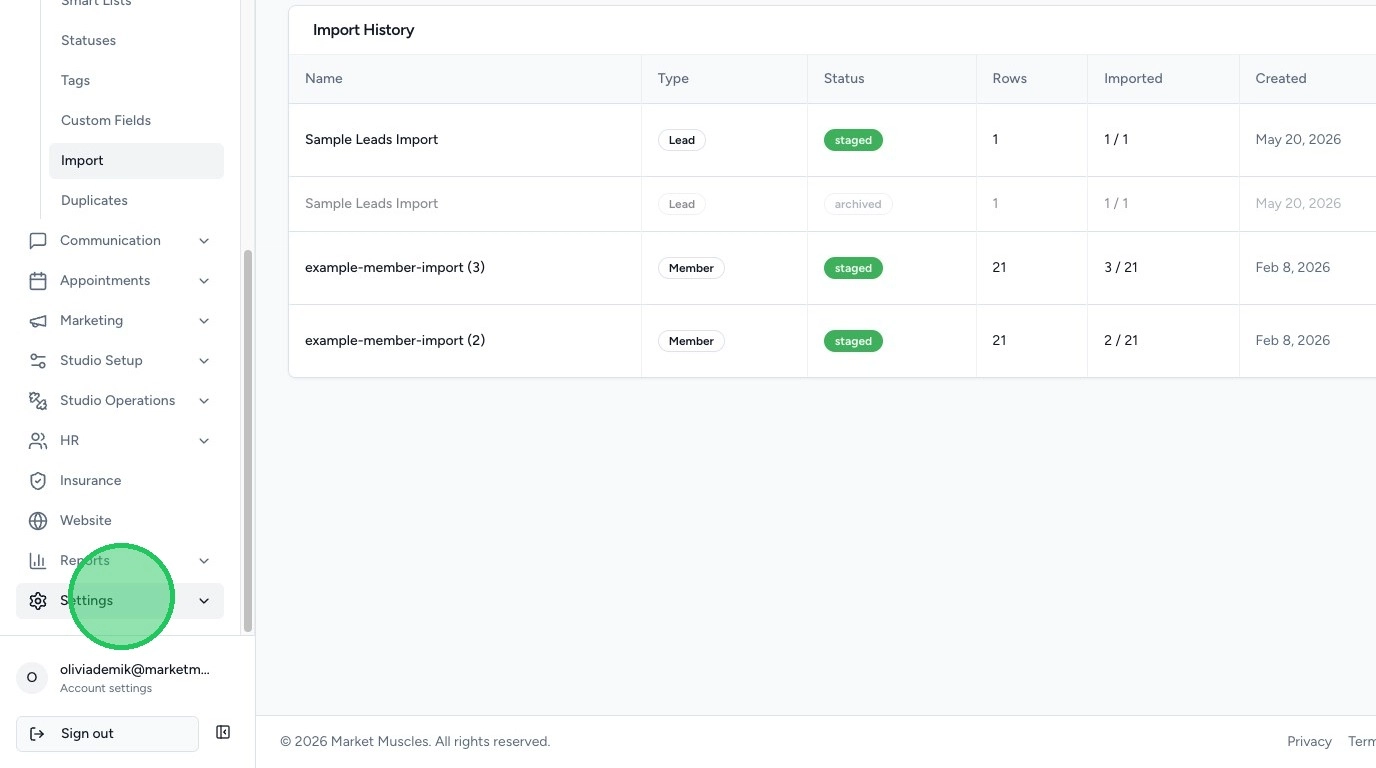
Click the Contacts tab in the left-hand navigation menu.
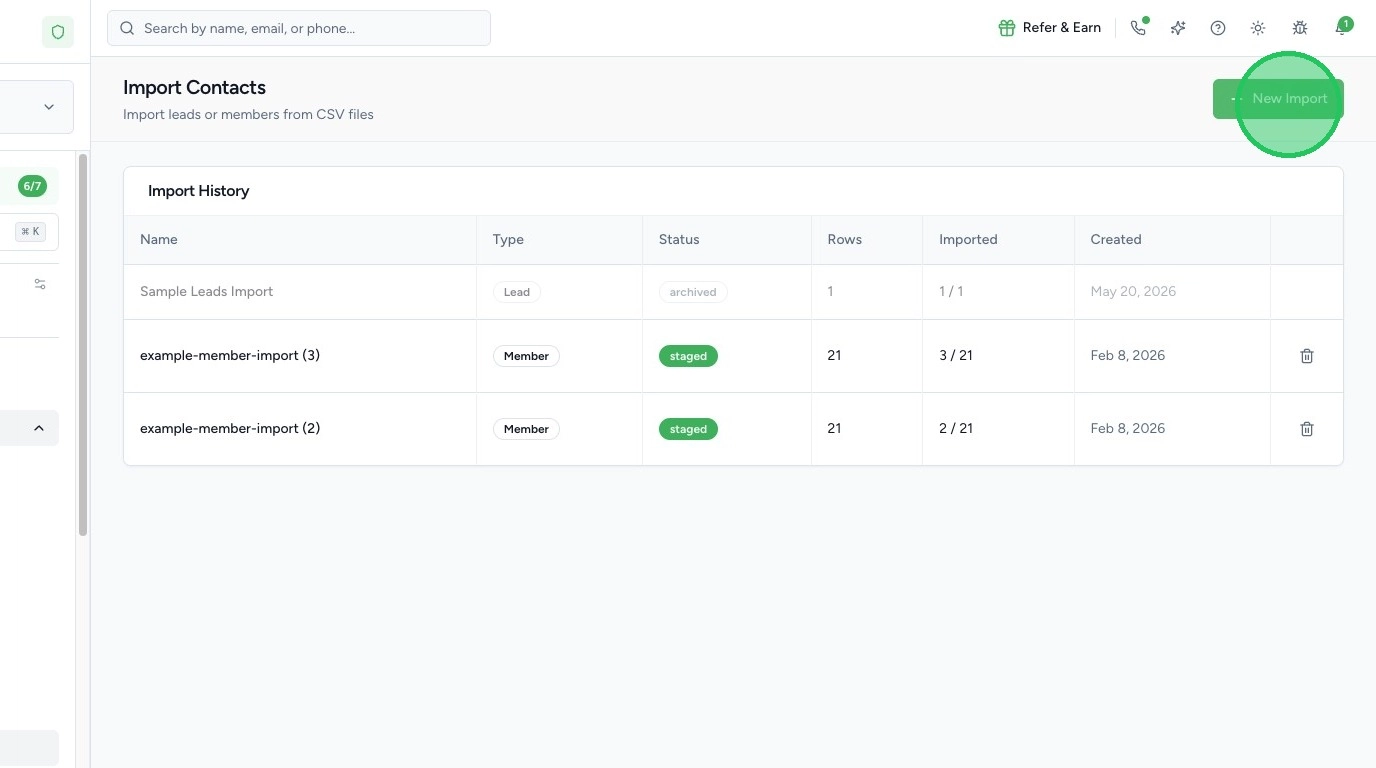
Click Import.
On this page, you will see:
- A New Import button (top-right)
- A list of previous imports and their statuses
3. Start a New Import
Click New Import.
From here, you can:
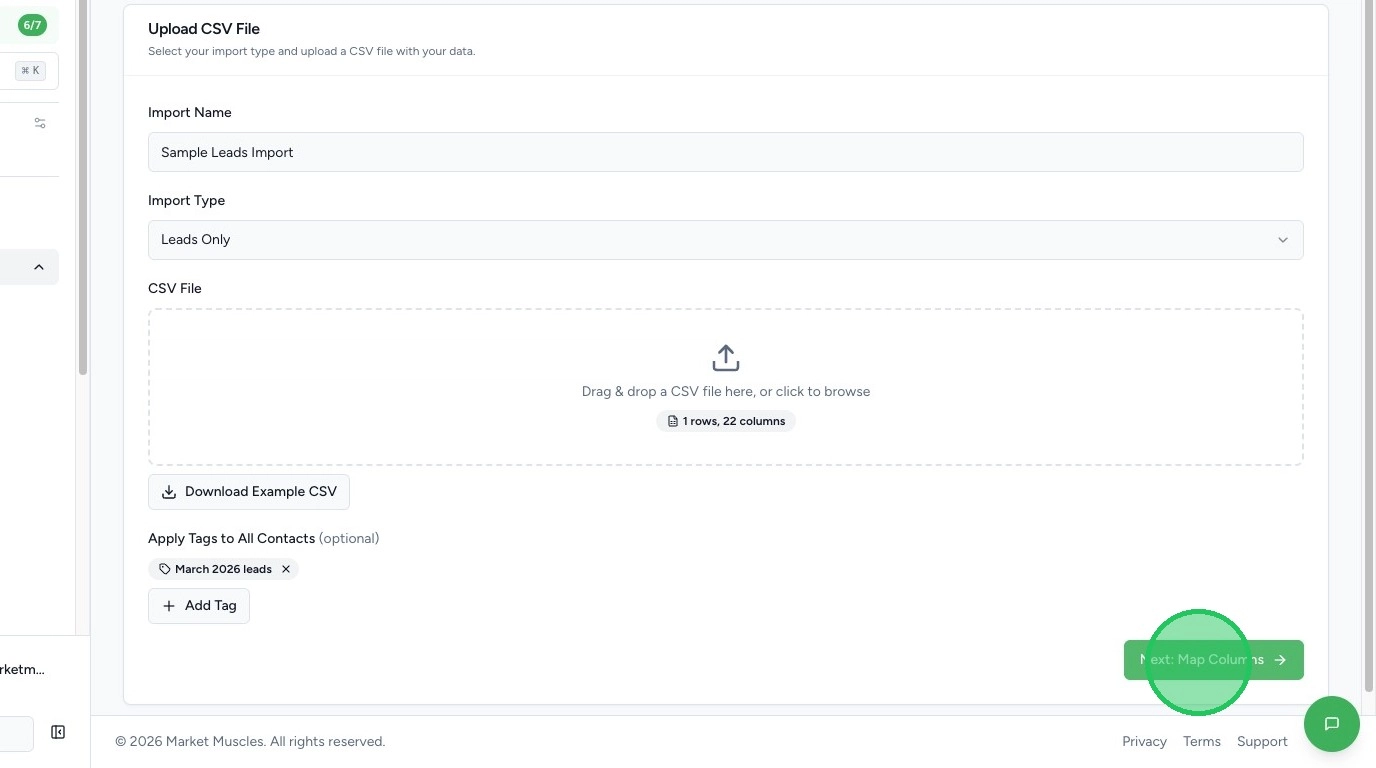
- Enter a Name for the import
- Choose the import type:
- Leads
- Members with Memberships
- Upload your CSV file
- Optional: You can auto-add tags to these contact imports if desired.
Tip: If needed, download the example template first to ensure your columns are formatted correctly.
4. Upload & Match Columns
After uploading your CSV file, you will be prompted to match your CSV columns to the corresponding fields in the system.
- The left-hand side shows your CSV column headers.
- The system fields will appear as selectable matches.
If a column does not automatically match:
- Use the dropdown to manually select the correct system field.
- Example: If your CSV says “State” but it doesn’t auto-match, manually select the State field.
Once all columns are matched correctly, click Review.
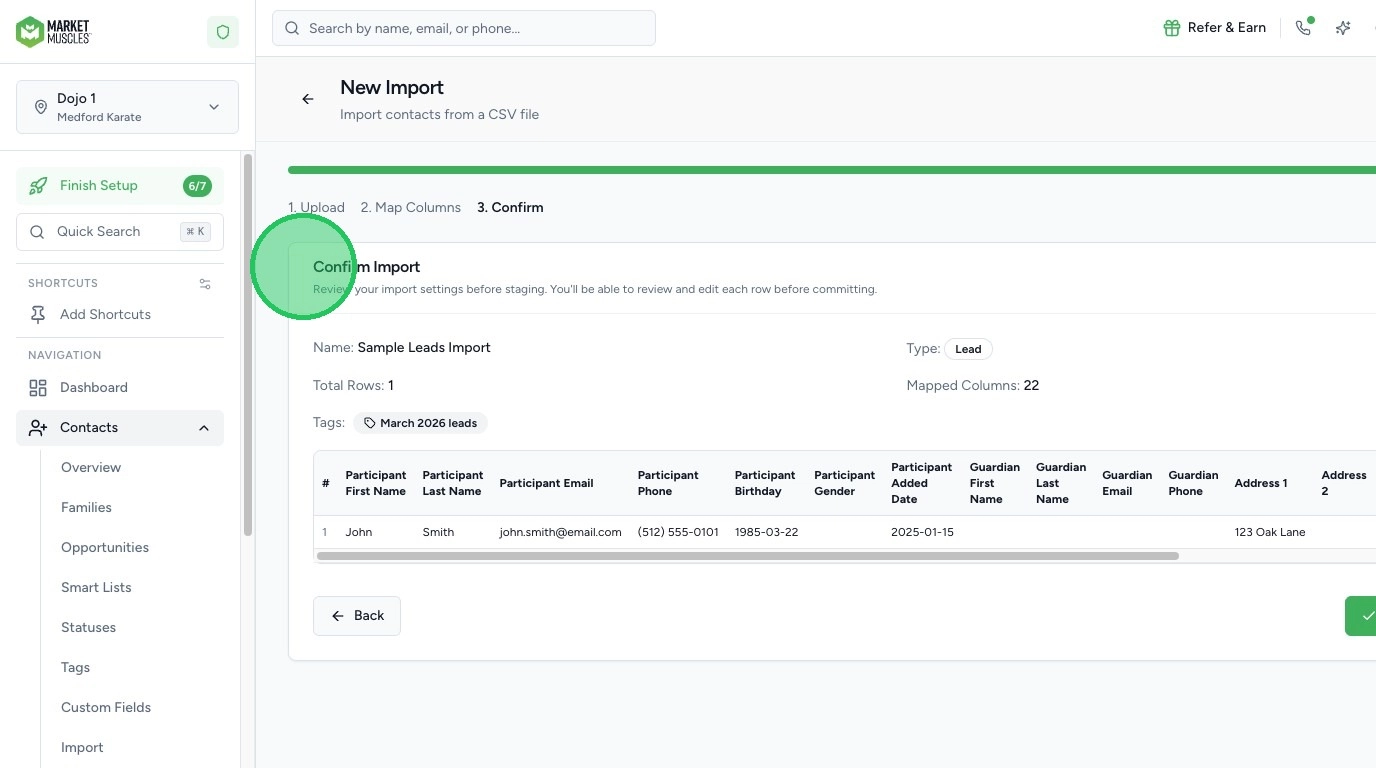
5. Review the Import Data
The system will display a preview of several rows.
At this stage, you should:
- Verify names, emails, memberships, styles, and rosters
- Confirm data appears in the correct columns
- Look for errors
If there are errors:
- They will appear highlighted in red
- Click into the field to see what needs to be corrected
6. Stage & Complete the Import
Once everything looks correct:
Click Stage Import.
Depending on your import type, you may see additional options:
- Add a Payment Method
- Request payment via:
- SMS
- Both
If requesting payment, members will receive a link to enter their card information before finalizing the import.
Once ready, click Import to push the records into the system.
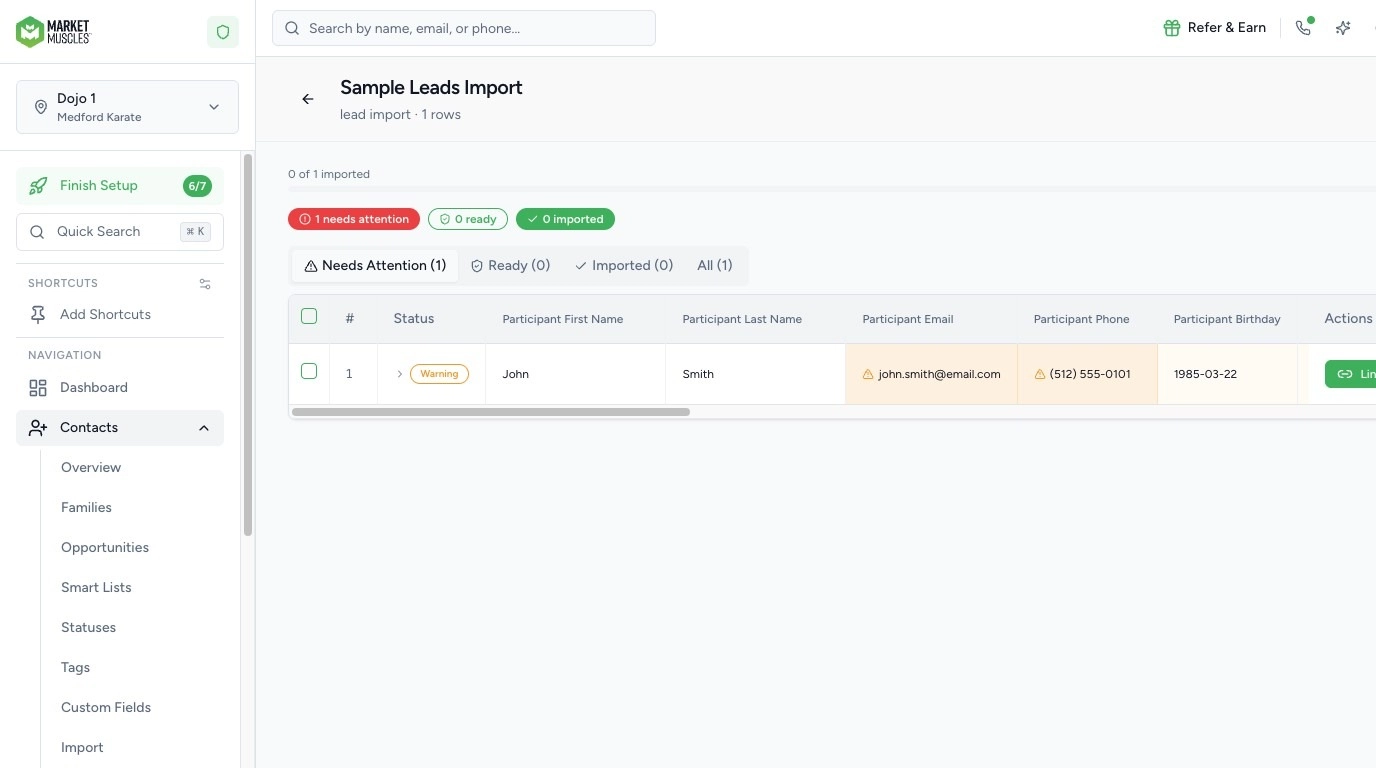
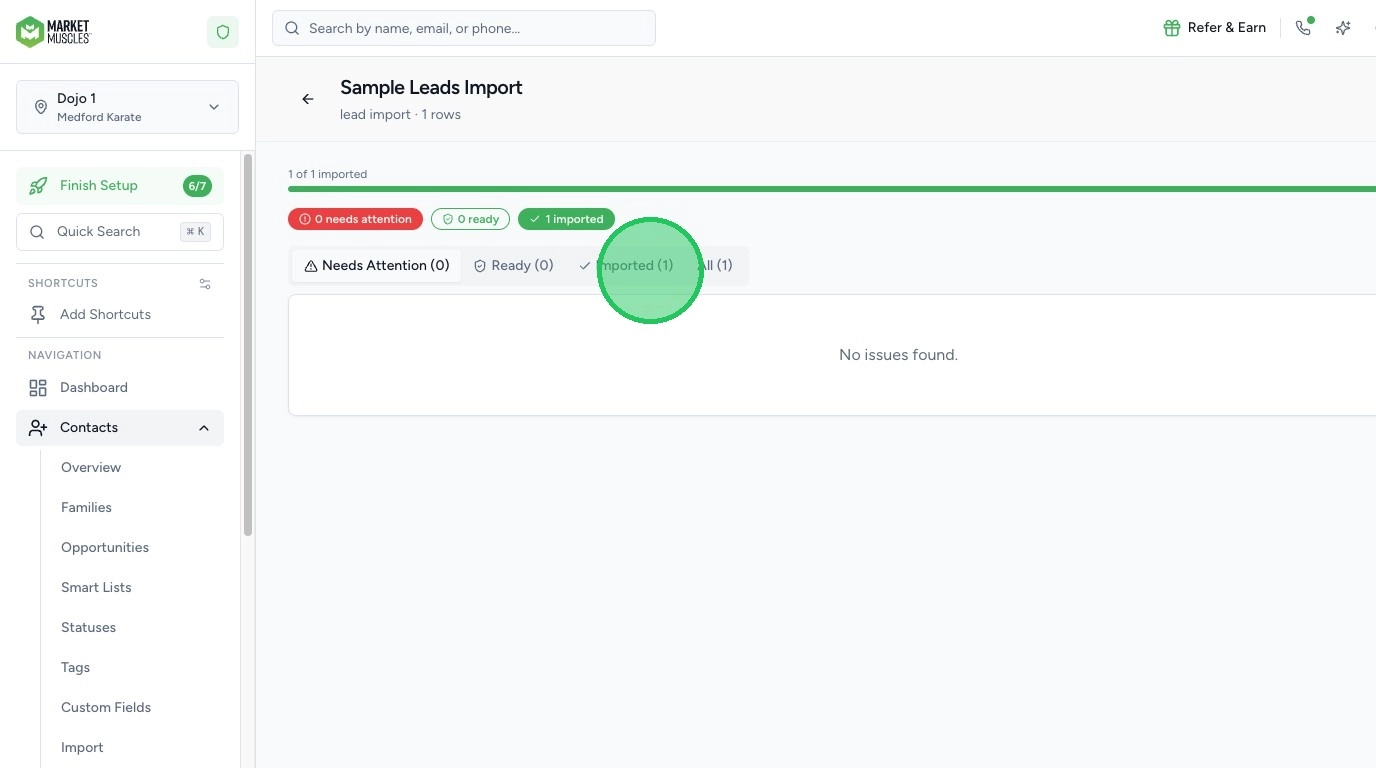
7. Review Completed Imports
After completion, return to the Import page.
You can:
- View all past imports
- Scroll through imported records
- Confirm successful processing
8. Lastly, we have an amazing Migrations Team here at Market Muscles.
If you do not want to handle your own imports or need more than just contact information imported, our team can handle it for you.
Navigate to the bottom of the menu and select Settings
Then select CRM Migration
Here you can fill out the form to have the follow items uploaded from your files or a previous CRM:
- Contacts & Students
- Memberships & Plans
- Classes & Schedules
- Retail Products
- Styles & Ranks
Our team will handle the uploads, give you a chance to review the information, and then finalize it for you.