Workflows
How to Create and Configure Automated Workflows
Learn how to streamline your communication by setting up automated workflows in the Market Muscles CRM. This guide walks you through selecting templates, adding messaging steps, and managing your enrolled contacts to ensure efficient lead nurturing.
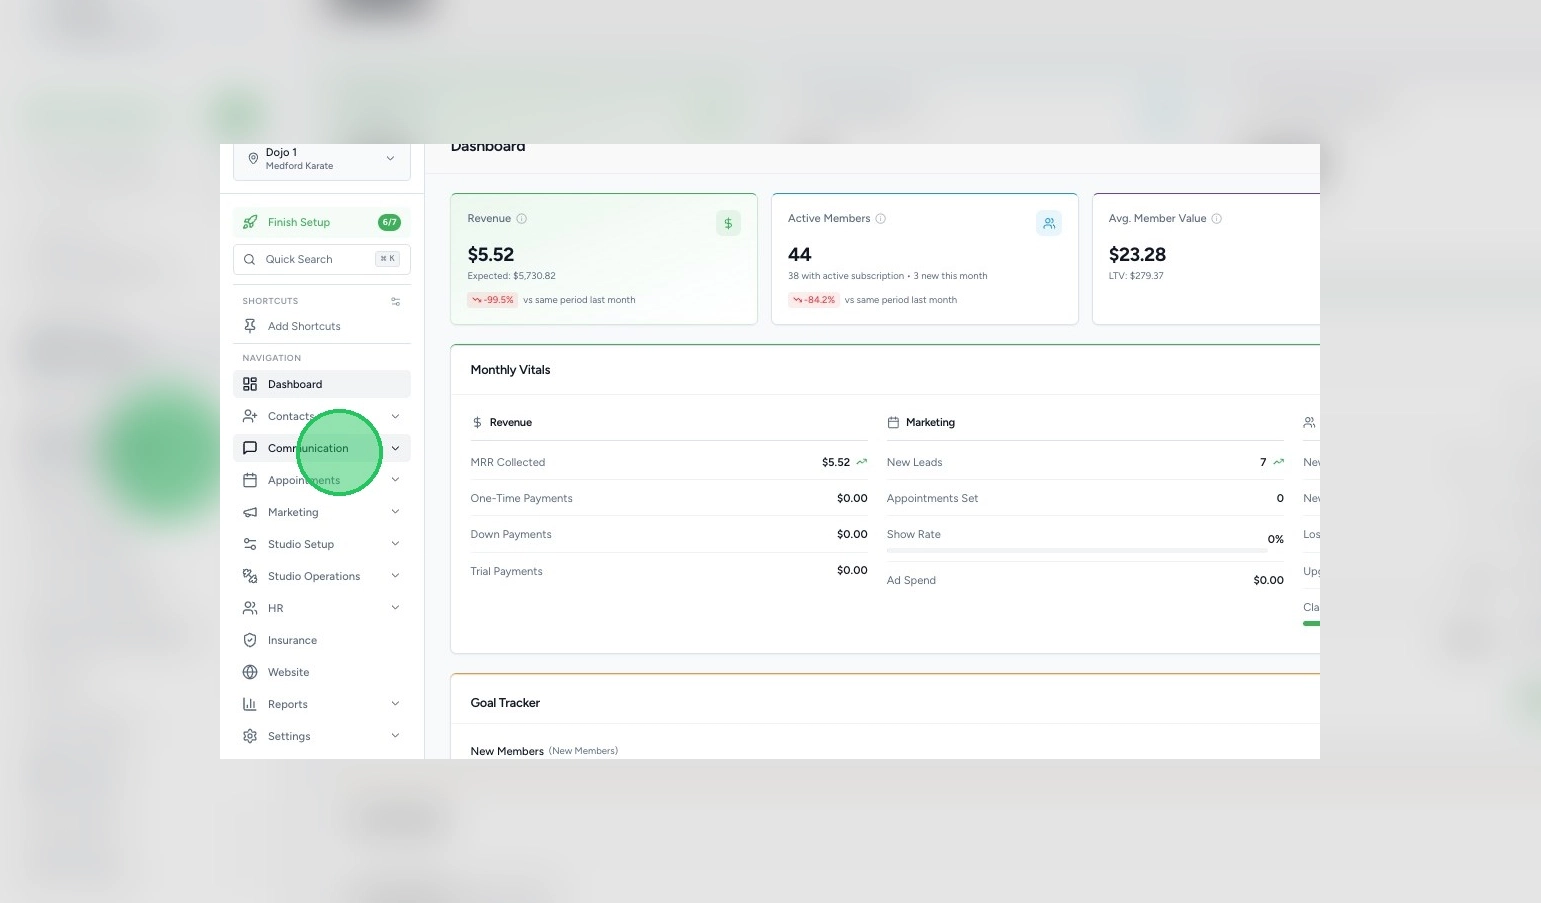
1. Navigate to your Market Muscles CRM Dashboard
2. Navigate to Workflows
Click the Communication tab in the left-hand navigation menu.
Click Workflows.
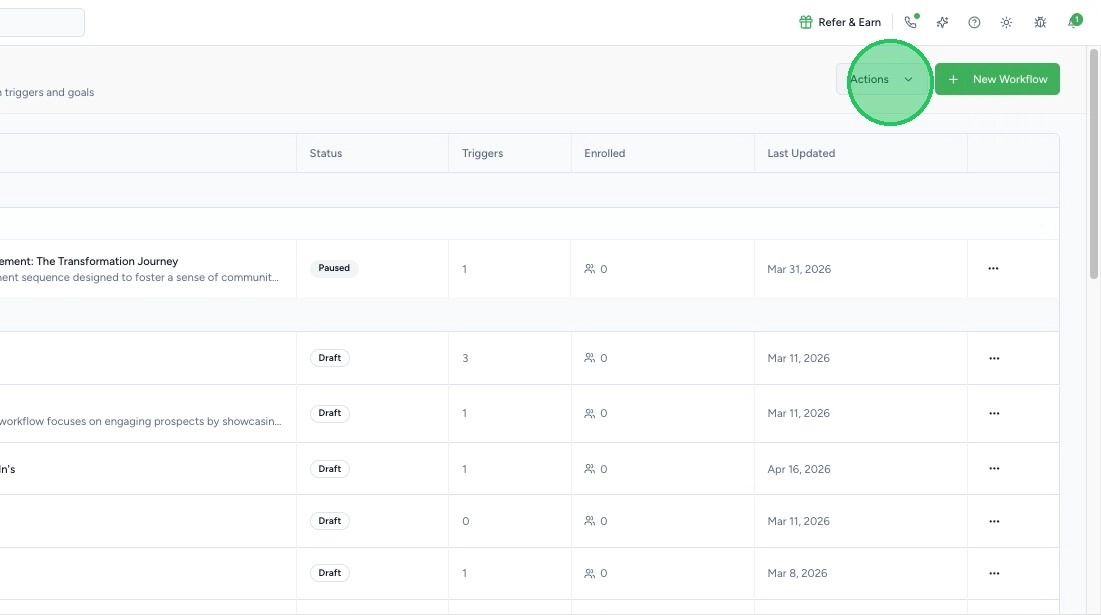
On this dashboard, you will see:
- All existing workflows
- Workflow status (Active or Draft)
- Number of triggers
- Number of enrolled contacts
3. Use the Workflow Library
Click the Actions > Template Library button to access pre-built workflow templates.
You can:
- Browse available templates
- Search for specific workflows
- Click Use Template to load it into your account
Once selected, the template will open in edit mode so you can customize it.
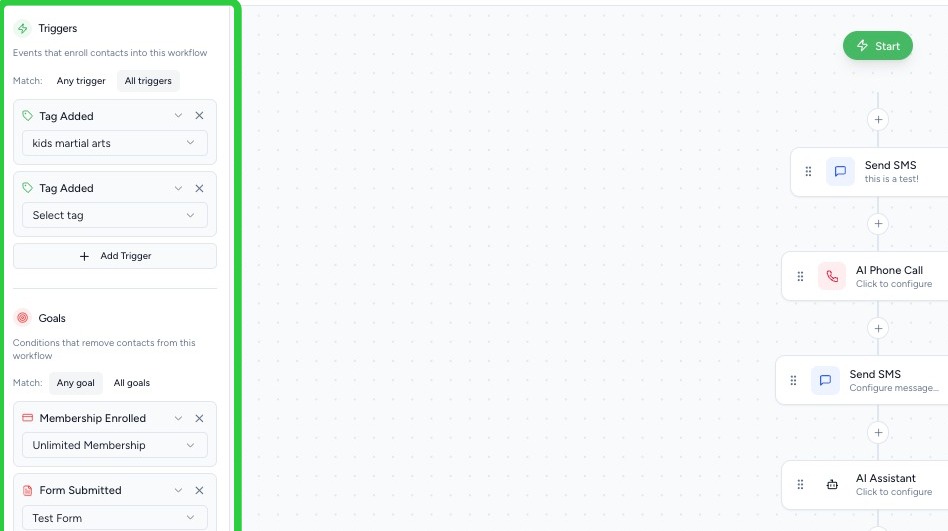
4. Understand Triggers & Goals
Inside a workflow, you’ll see:
- Triggers (left side)
- Goals
Triggers
Triggers determine how contacts enter the workflow.
Click Add Trigger to choose from options such as:
- Tag Added
- Status Changed
- Class Attended
- And many other system events
You can add multiple triggers to a single workflow.
Goals
Goals determine how contacts automatically exit the workflow.
For example:
- If a specific tag is added → Remove from workflow
- If a class is attended → Remove from workflow
You can add multiple goals just like triggers.
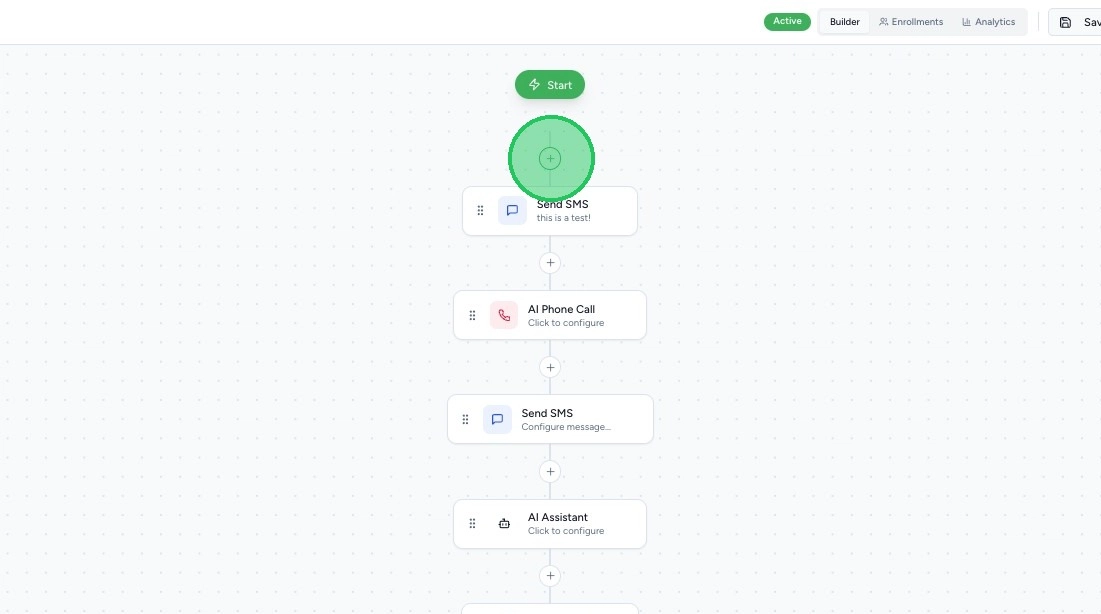
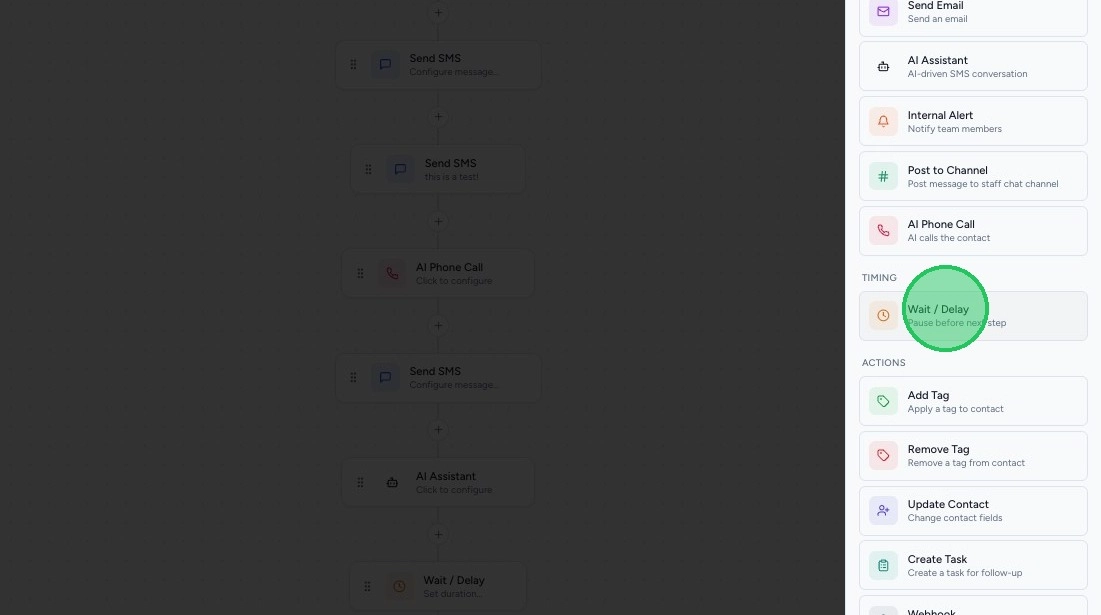
5. Add Workflow Steps
In the center of the workflow builder, you can add actions such as:
- Send SMS
- Send Email
- Wait (Time Delay)
- If/Then Logic
- Create Task
- Internal Notification
- Webhook (External API Call)
Click Add Step to select from these options.
You can:
- Drag and drop steps
- Rearrange them
- Insert delays between steps
6. Use Merge Tags
When creating SMS or Email steps, you can use Merge Tags.
Merge tags dynamically insert contact information such as:
- First Name
- Last Name
- Membership Details
This ensures messages are personalized automatically.
7. Add Time Delays
Most workflows require spacing between actions.
To add a delay:
- Click Add Step
- Select Wait
- Set the desired time (minutes, hours, days, etc.)
Contacts will move step-by-step from the Start, progressing downward through each action.
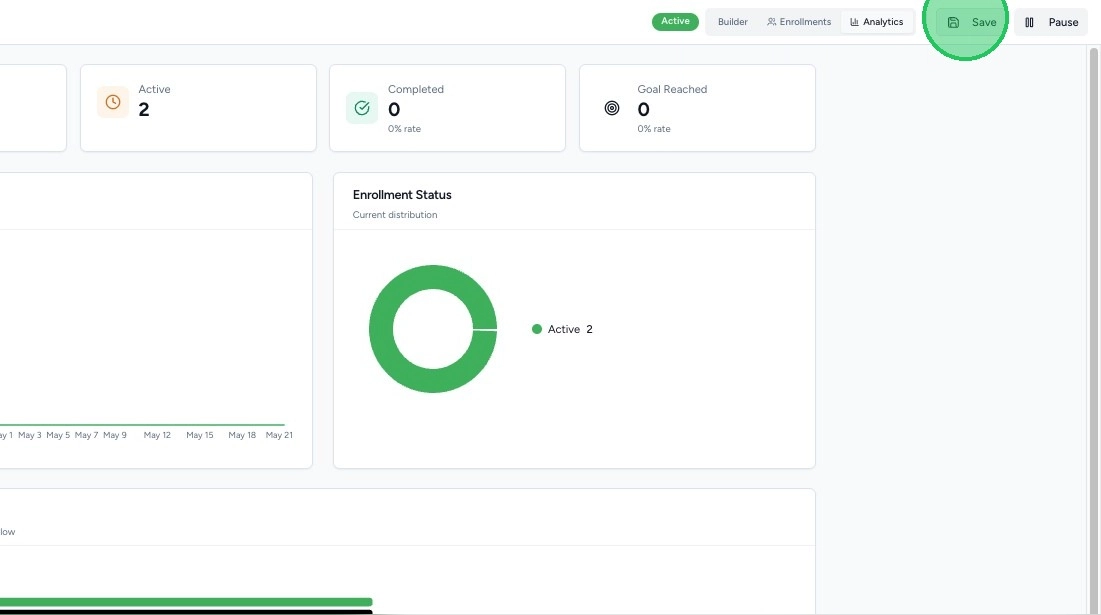
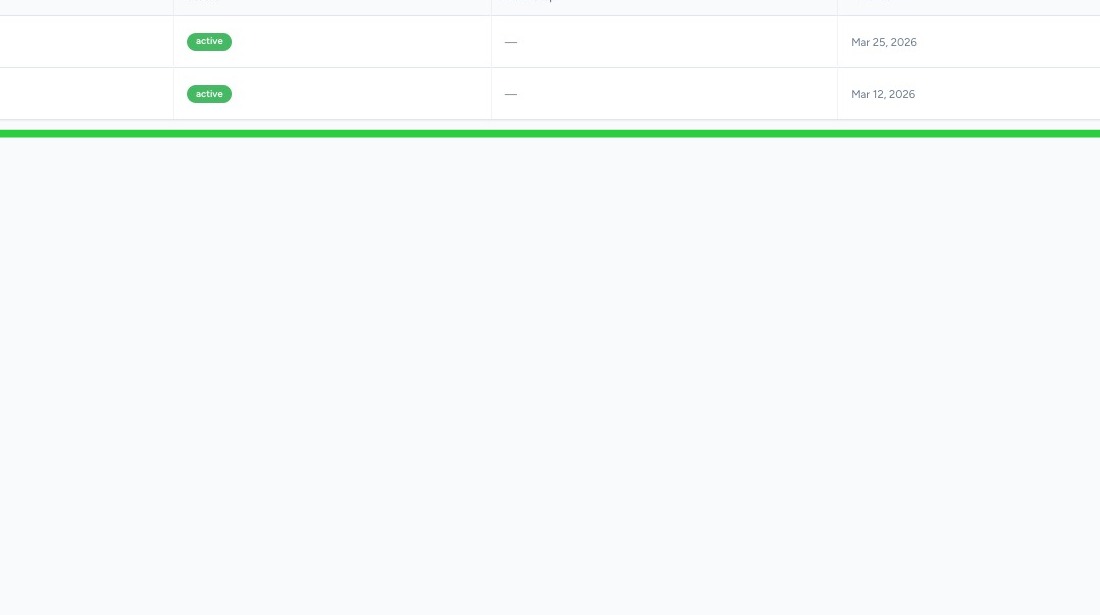
8. Manage Enrollment
Click the Enrollment tab inside a workflow to:
- View enrolled contacts
- See who is Active
- See who Completed
- See who reached a Goal
You can also manually enroll contacts from this section.
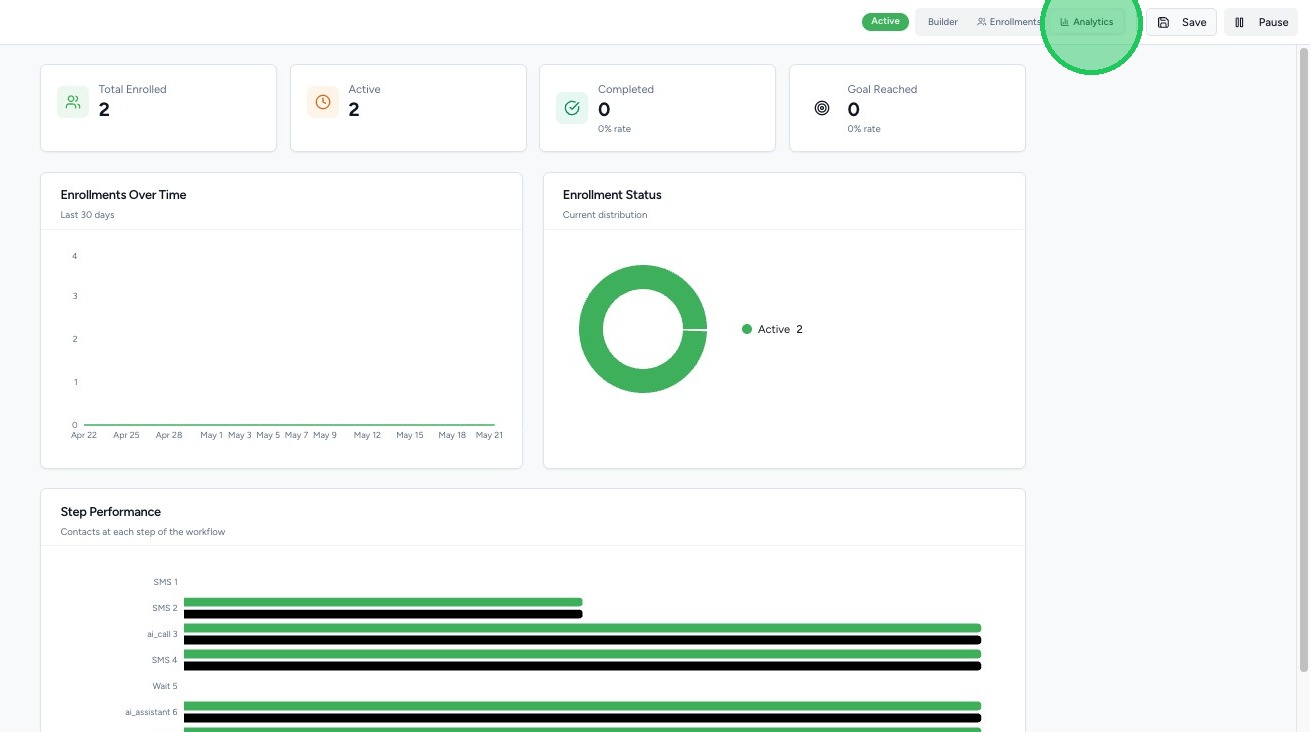
9. View Workflow Analytics
Within each workflow, you can see:
- Total Enrolled
- Active Contacts
- Completed Contacts
- Goal Reached
This helps you measure performance and effectiveness.
10. Save, Activate, or Pause a Workflow
Once your workflow is ready:
- Click Save
- Click Activate to turn it on
If the workflow is already active, you can:
- Pause it
- Review analytics
- Edit and re-save as needed